<---Previous =============== Next--->
Final Details
Since I did not know what design issues might lay ahead, I focused on the following tasks to minimize the pain and suffering in completing my car:
Initial body fit and finish
Prime body with a high quality epoxy primer
Assemble the car
Get the car inspected and registered in Minnesota
Drive the car several hundred miles to expose issues
Make necessary design changes
Final body fit and finish
Final Paint
Reassemble panels
Initial Fit and Finish
You won't believe how often the car parts had to be installed and removed to ensure proper function, fit and finish.
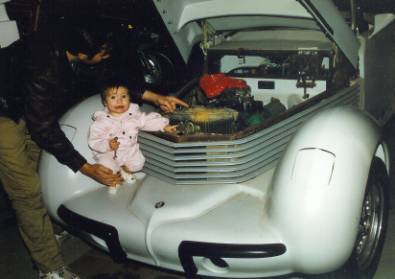
Danika suggests getting the radiator fixed (Fall 2003)
After years of tweaking the design, the parts are ready for painting. Priming is the next step.
Prime
June and July aren't the best months in Minnesota to be sanding fiberglass – it is quite hot and humid. One could say that I was itching to get this part of the project done. Believe me, there was always huge relief to get the parts out of the garage and into the paint shop. I was amazed how the primer made a part transform from a random patchwork of fiberglass and into a part that looks professionally made. The parts do, indeed, look pretty good. It's hard to believe how much work has gone into each one and that I'm almost done. It's also hard to believe I've made over 70 fiberglass parts (that is not counting some parts that were made more than once)!
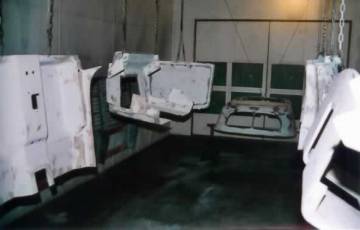
Floor panels and roof are hung in paint booth prior to application of PPG epoxy
primer. (June 2005)
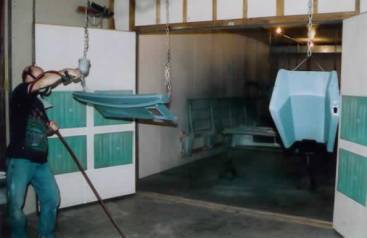
Ken Lubahn paints windshield cowl and transmission cover with epoxy
primer. (June 2005)
Assemble the Car
Once the primer has cured for a week or so, the parts were brought back to the
garage for assembly.
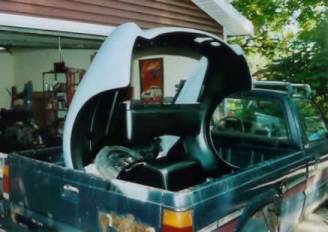
Painted parts being returned for assembly. (Aug 2005)
Panels being assembled on frame. (Aug 2005)
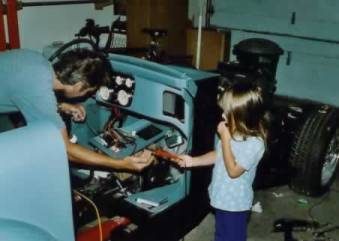
Danika hands me the HOT soldering iron. (Sept 2005)
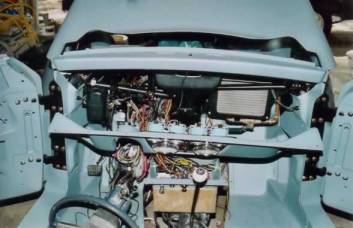
Behind the scenes. Dash packed with electronics and
mechanism. (Sept 2005)
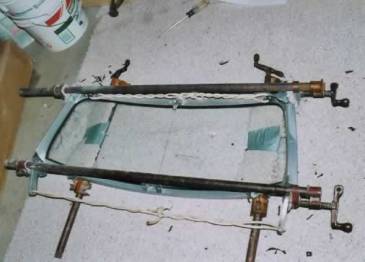
Shaved and trimmed MGB windscreen being assembled into
frame. It took 5 hours! (Sept 2005)
As summer was fast approaching its end, assembly of the car was complete.
Next task was to get the car registered, licensed and insured.
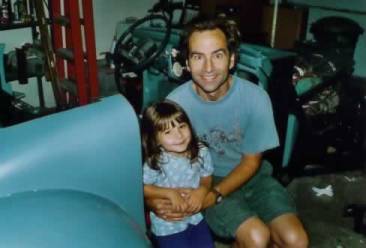
My little helper - Danika. (Sept 2005)
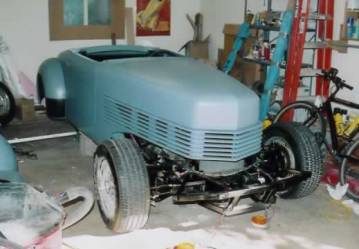
One year after the first drive, approximately 1000 hours is devoted to tweaking, modifying and priming the parts of the car. The car is now ready for official Minnesota registration. (Sept 2005)
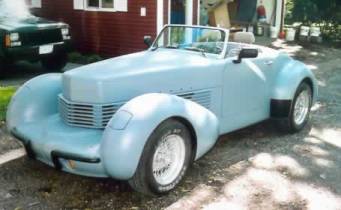
Left front quarter view of car. (Sept 2005)
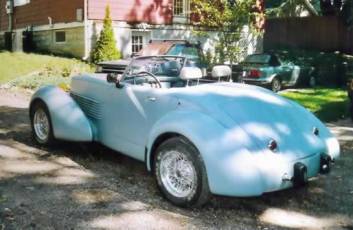
Left rear quarter view of car. (Sept 2005)
<---Previous =============== Next--->
Hosted by MagicWeb.us